

Hammer Manual
Owner's manual and setup guide.

Owner's Manual
This manual covers The Hammer XT Head and Handle, and Hammer LT Heads.
Mix and match all Hammer heads and handles to build the slingshot / slingbow of your dreams!
Choose the interchangeable LT heads to convert from slingshot to slingbow with the swap of a head or the XT head with our exclusive FlipClip X band attachment and conversion between slingbow and slingshot in one head.
The XT Handle is recommended for heavier bands and arrow shooting.
THE HAMMER COMPONENTS
All Hammer XT Heads fit the XT Handle, and use Heavy Slingbow Tubes or FlipClipsX.
All Hammer LT Heads fit the XT and LT Handle, and use Ocularis Plugs.
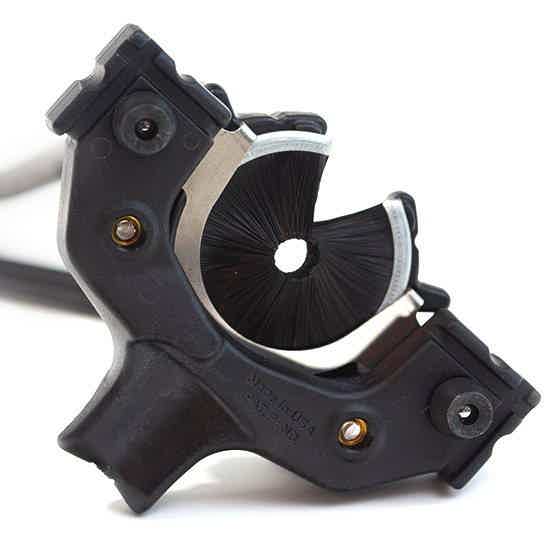
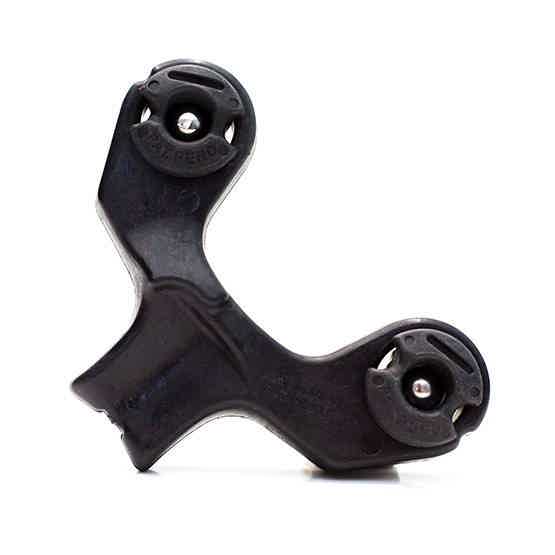
XT Head
Shown in slingbow configuration.
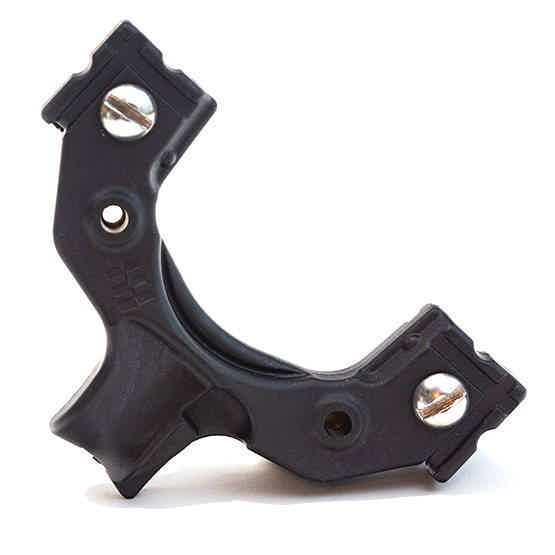
XT Head
Shown in slingshot configuration.
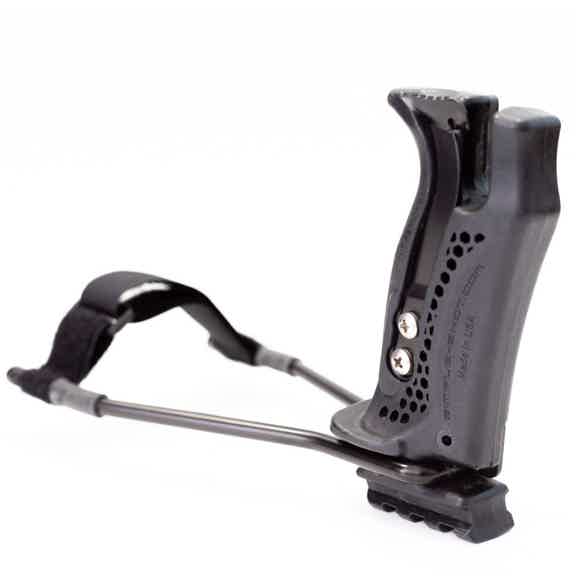
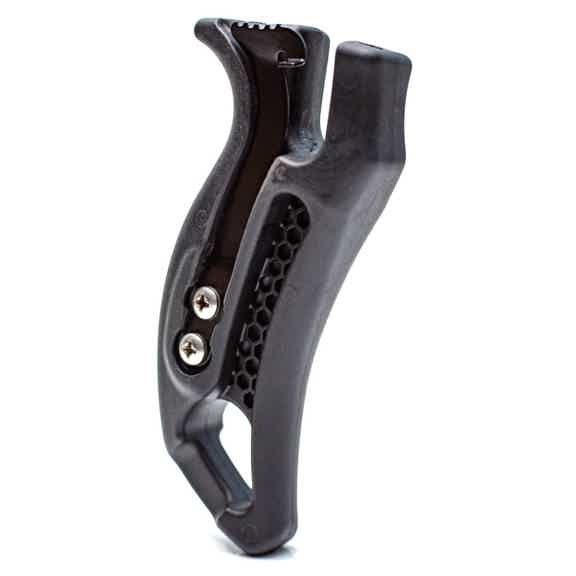
XT Handle
Receives all XT and LT heads.
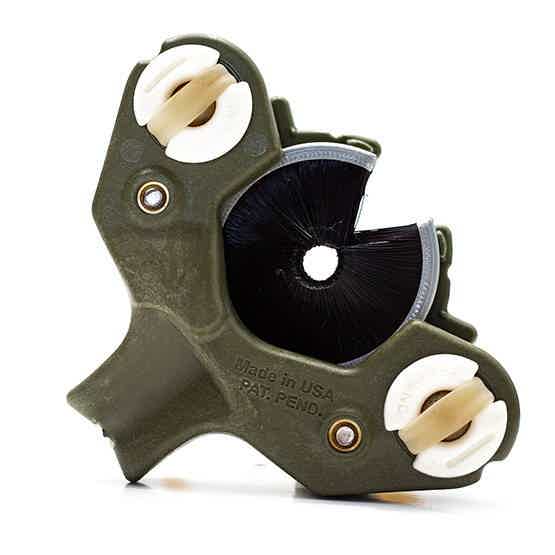
LT Head
Shown in slingbow configuration.
LT Head
Shown in slingshot configuration.
LT Handle
Receives all XT and LT heads.
GENERAL SETUP INSTRUCTIONS

WARNING!
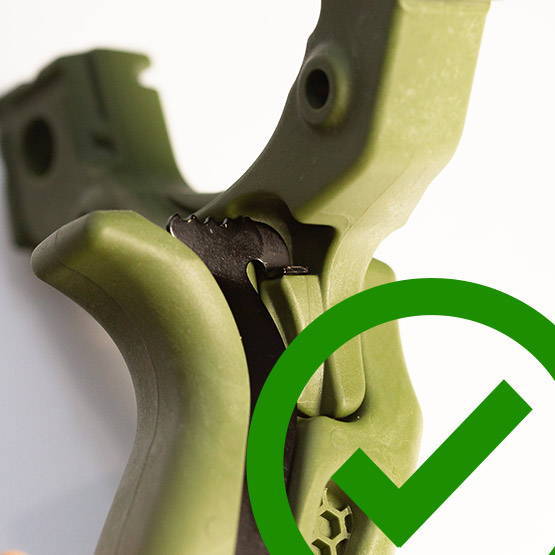
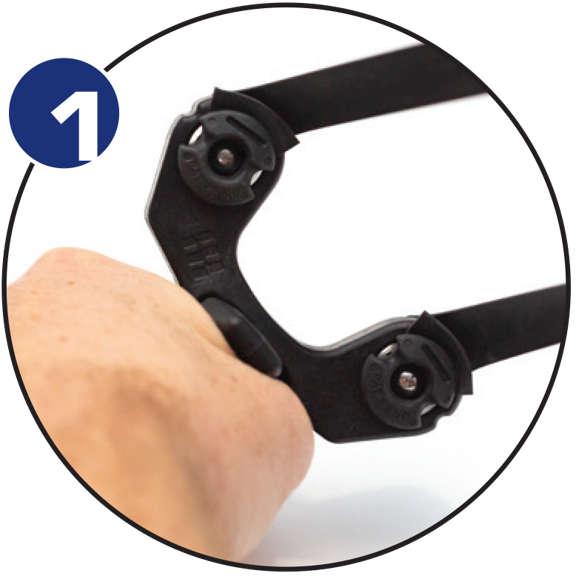
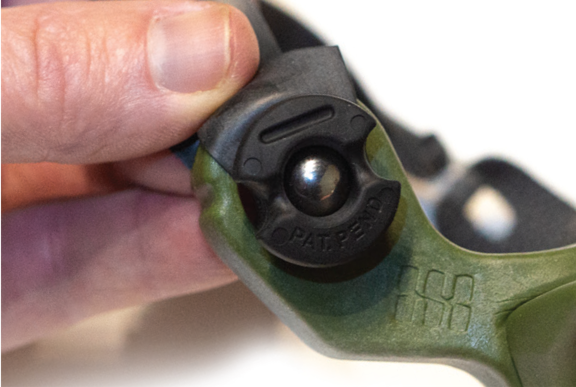
- Always visually inspect the locking mechanism to ensure it is in the fully seated position.
- While shooting, always double check to ensure the locking mechanism is fully engaged.
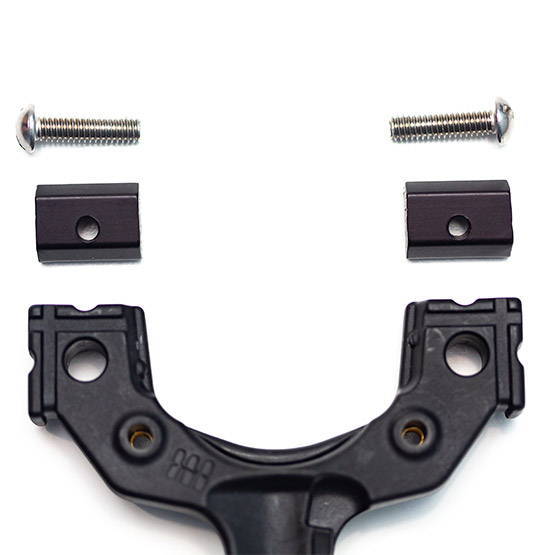
Installing The Wrist Brace For XT Handle

- Slide wrist brace into slot at base of handle.
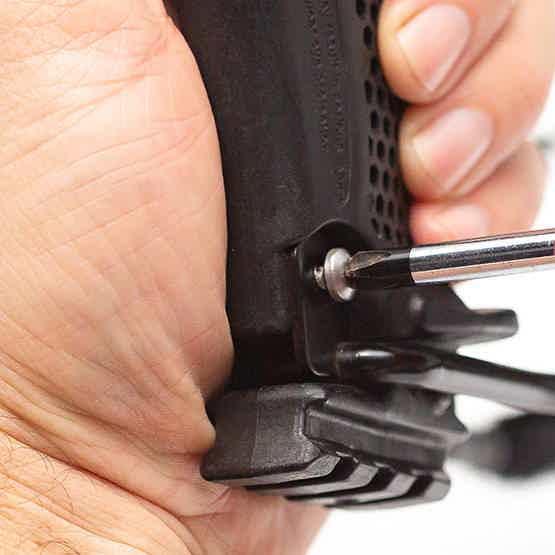
- Install wrist brace retention plate with supplied screw to secure in place.
- To remove wrist brace, remove screw from retention plate and slide wrist brace out of slot at base of handle.

- Wrist brace folds around frame for compact storage
XT FLIPCLIP X™ INSTALLATION
Step 1.
Choose your preferred band configuration (OTT or TTF) and line up your FlipClipsX™ accordingly.
NOTE: There are no left / right difference in FlipClip X for Hammer.
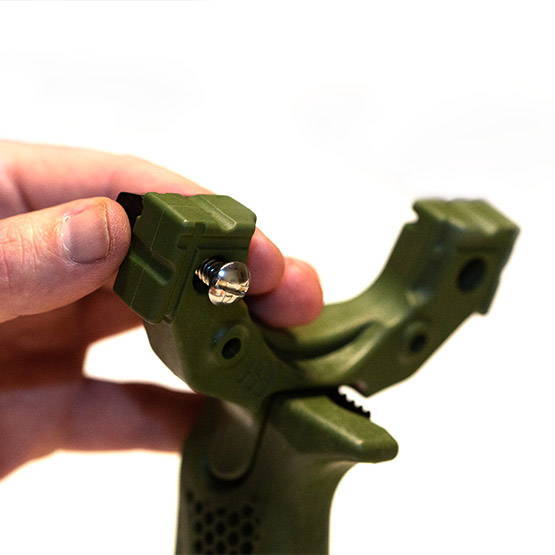
Step 2.
Carefully fasten the FlipClipX™ to your frame. Take care to ensure the screw is installed straight into the hole to avoid cross threading and keep it loose for now to leave room to insert your bands.
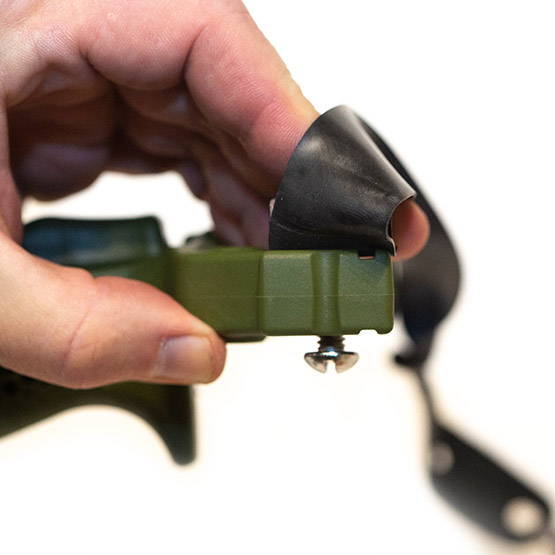
Step 3.
Place your band all the way into the FlipClipX™ and hold the FlipClipX™ firmly to keep the band in place.
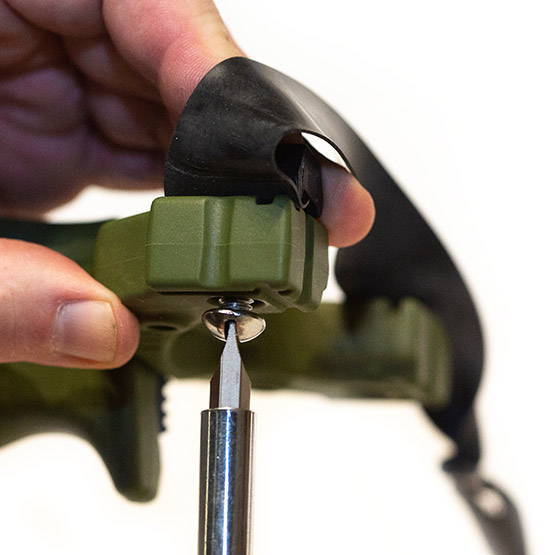
Step4.
Tighten the fastener the rest of the way.
No need to over tighten. Just snug is just right.
In step 4, No need to over tighten. Just snug is just right.Be careful to not damage the band as you tighten the FlipClip.
Just a simple rotation of FlipClip X™ converts from TTF to OTT
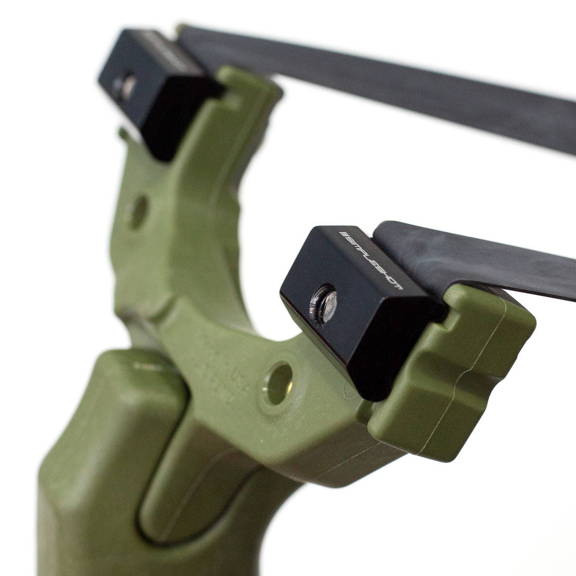
FlipClip X™ installed OTT (Over the Top)
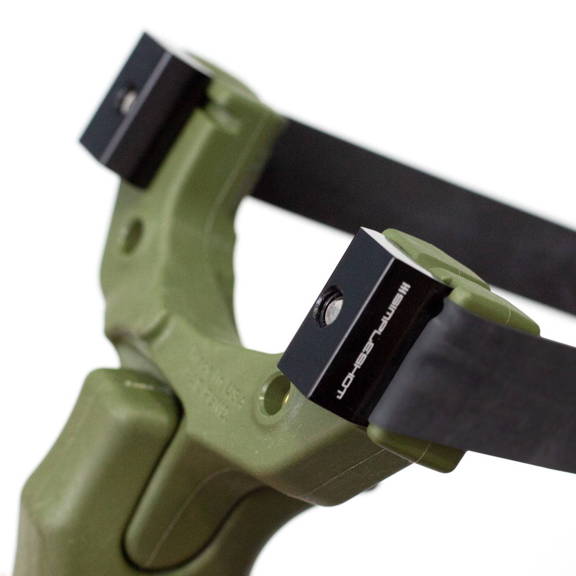
FlipClip X™ installed TTF (Through the Forks)
XT SLINGBOW TUBE INSTALLATION
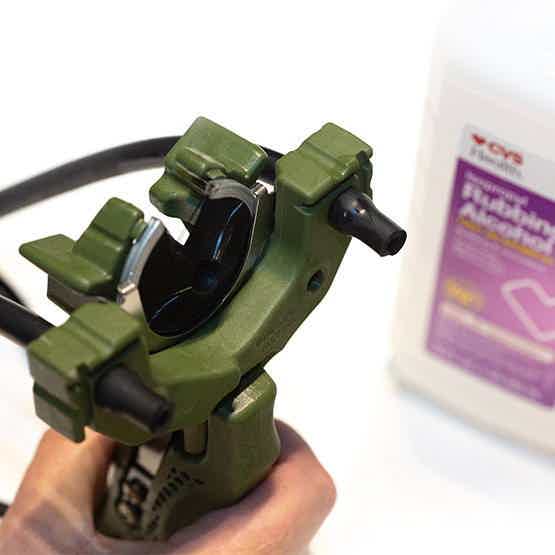
Installing Slingbow Tubes:
1: Lubricate tubes by dipping the end in rubbing alcohol.
2: Insert bands shooter side first through the slingshot head.
3: Once the tubes are through the head, insert ball bearings into the end of the tubes to the desired length. Dip again if needed.
4: Allow the alcohol to dry for 24 hours before shooting.
Still not sure? Watch the Video Below…
IMPORTANT: Do not let the alcohol run inside the tube down to the D-Loop attachment!
Dip the end of the tube that attaches to the frame in alcohol and keep that end down .
Always keep the alcohol from running down inside the tube.
Do NOT pour alcohol into the tube.
XT SLINGBOW HEAD CONVERSION
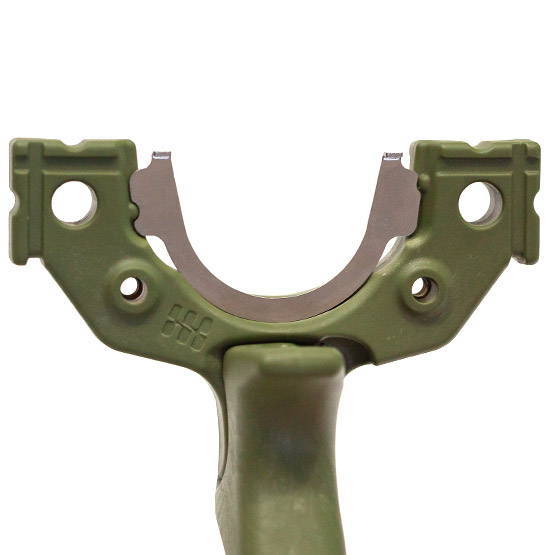
Step 1.
Place the brush mount adapter plate on the slingshot head in between the forks with the notches interlocked.
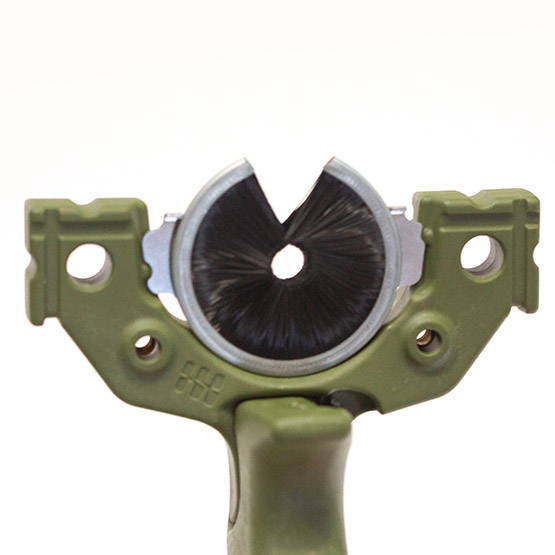
Step 2.
Place the circular brush arrow rest (“Whisker Biscuit”) on top of the adapter with the open end upwards.
Step 3.
Install the mounting bracket on top of the arrow rest with the tabs around the edge of the arrow rest and secure with supplied screws.
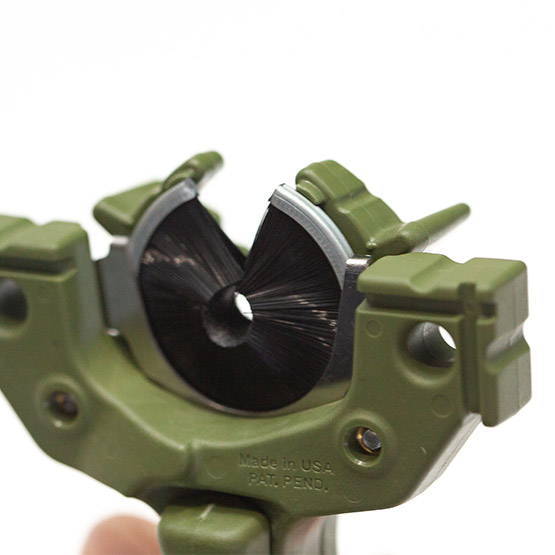
Step4.
Double check all alignments on each component.
To revert, simply remove screws and slingbow components.
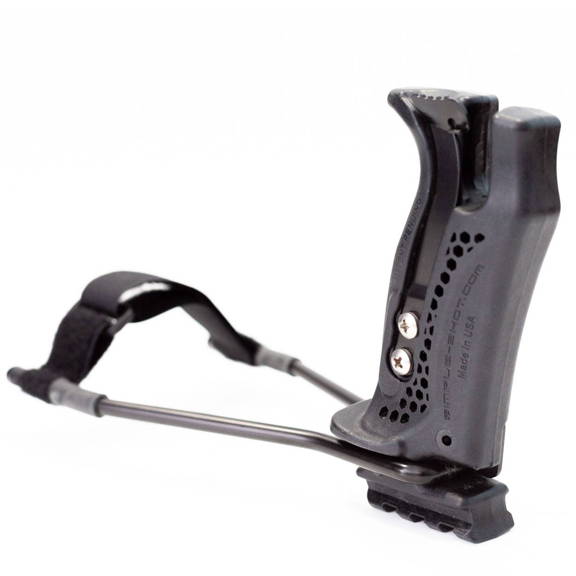
The XT Handle
- Removable / Foldable wrist brace
- Integrated rail system (Weaver / Picatinny compatible)
- Recommended for shooting heavy bands and all arrow shooting

The LT Handle
- Best for portability / pocketability
- Recommended for slingshot mode
- Thin profile and awesome ergonomics
Which Arrows Do I Choose For My Hammer Slingbow?
The Hammer Slingbow will shoot most full length arrows well.
For best performance, we recommend carbon arrows in the 400 spine range. We suggest you shoot full length arrows at the standard 31"-32" stock length. If you have a very short draw length, you may trim them shorter.
_If your draw length is 28" or longer, DO NOT trim the arrows shorter._
Most big box store sporting goods sections offer full length carbon arrows. You might also check in with your local archery pro shop.

Do not shoot stones or rocks from any slingshot.
Rocks – no matter how round they look – shoot erratically and shooting them may damage your slingshot and bands.
Due to the uncontrollable nature of shooting non-spherical projectiles, shooting a rock from a SimpleShot slingshot voids any / all warranties.
Remember The Four Rules of Ocularis™
FLATBANDS
Plugs on shooter side. Bands pull around the frame.
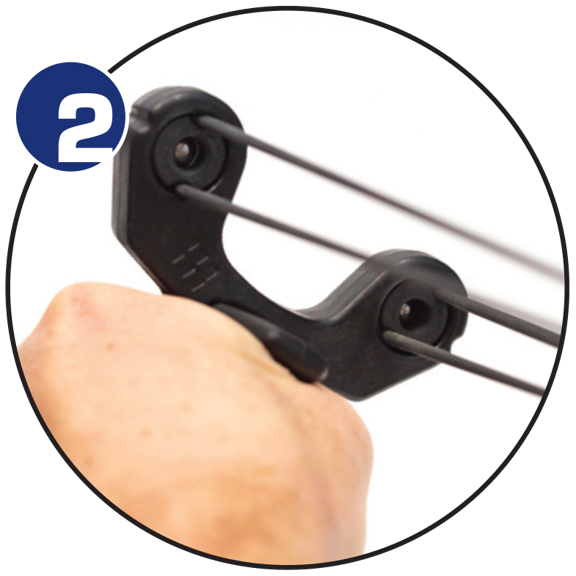
TUBES
Plugs on target side. Bands pull through the frame.
HEAVY TUBES
White plugs only.

ALL BANDS
Seat the ball bearing half way through the plug.
TARGET SIDE: The side of the slingshot facing the target as you draw.
SHOOTER SIDE: The side of the slingshot that is facing you when you draw
Flatband Installation
Place the band into the fork from the ‘target’ side of the slingshot in whichever orientation you desire – over the top, through the forks, or somewhere in between. Push the plug securely into place from the ‘shooter’ side of the slingshot while gently pulling the band towards the ‘target’ side of the slingshot to ensure the plug is completely seated against the slingshot fork.

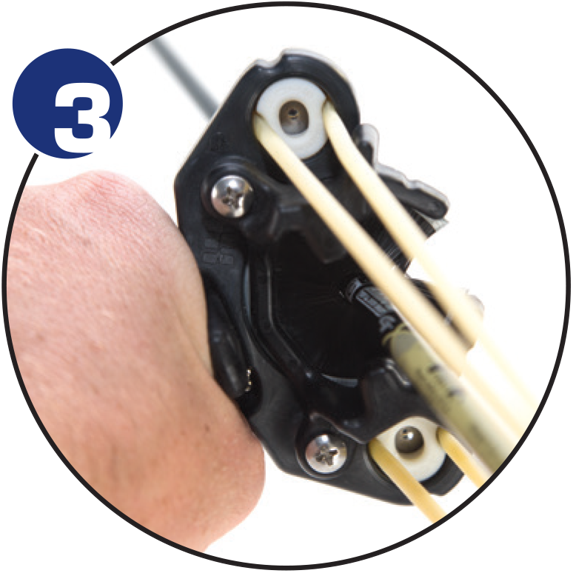
Tube Installation
Insert the looped tubular band from the ‘shooter’ side of the slingshot as shown. Place the Ocularis™ Plug on the ‘target’ side of the slingshot and seat the tubular bands in the saddles on plug as shown. Take care to ensure the plug is placed in the center point of the loop prior to inserting plug from ‘target’ side of slingshot. Push in plug while gently pulling looped bands from the ‘shooter’ side of the slingshot.
Repeat the process for the second forktip. Double check that both bands are installed in the same orientation. Carefully test the assembly to ensure it is secure before firing the slingshot.
Ball bearings may be inserted prior to or after band installation.
Rubbing alcohol or saliva may be used to lubricate the bearing for easier insertion.
Frequently Asked Questions
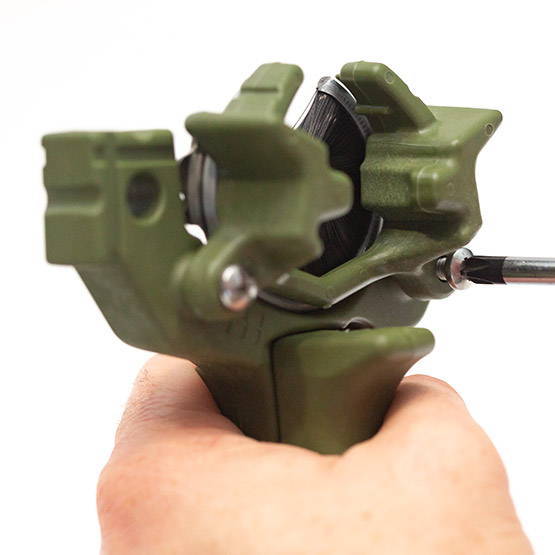
Hammer XT Bowfishing Handle Set-up?
To slingbow fish with the Hammer XT handle what you need is a Archery Accessory Adapter $10.00 and a Rail Adapter $12.00 to hold it. (Those are both clickable links that will take you to that page.)
You can use either the LT Slingbow Head or the XT Slingbow Head.
The next part we DO NOT carry but I'll include a link to where to get those as well! What you need is a reel, reel seat, and a power rod. We recommend RPM Bowfishing. Here is a link to their complete kit listed in their online store. The reel seat will screw right into the Archery Accessory Adapter that we sell.
Do all Hammer parts fit each other?
Which arrows do I choose for my Hammer Slingbow?
Which Hammer should I get?